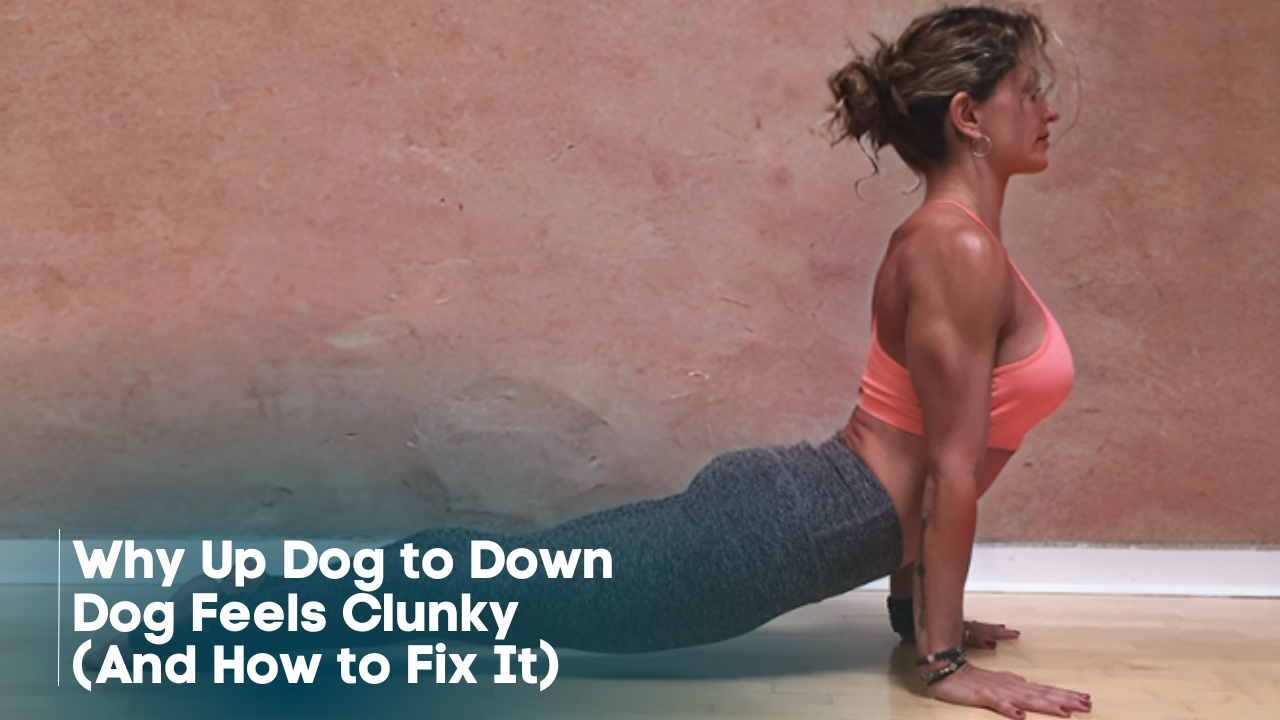
Why Up Dog to Down Dog Feels Clunky...And How to Fix It
Ever get stuck coming out of upward facing dog? You’re flowing through a vinyasa, feeling strong in your backbend, and then…it’s like someone Gorilla Glued your pelvis to the mat while tossing a ten-pound weight on your butt.
Your lower back groans, and the easiest solution seems to be dropping your knees, passing through tabletop, and finally landing in downward facing dog.
But dropping the knees doesn’t have to be your go-to move.
In this article, I’m breaking down why so many of us reach for tabletop mid-transition, and how to build the strength and coordination to glide from Up Dog to Down Dog without ever touching your knees (bye-bye, Gorilla Glue).
You’ll get step-by-step guidance, a few simple drills to fire up the muscles that do the heavy lifting, and tips to help your body understand the movement so your flow feels smoother, stronger, and way less frustrating.
Why Most People Drop Their Knees in the Transition
This transition is all about timing and coordination: your core, hands, and feet all need to work together so that your hips can lift and move back smoothly. Dropping the knees in is completely normal. Your body is just looking for an easier way to move from one pose to the next.
Here’s what usually causes us to pass through table-top:
- The core isn’t firing: Without your belly muscles engaging, the hips don’t get the signal to lift and move back.
- Hands and feet aren’t active: If they aren’t pressing down into the mat, the hips don't have the power to lift up.
- Timing is off: The hips try to move before your core, hands, and feet are ready, and the knees hit the mat first.
The key to a smooth transition is training your body to move as a unit, and it comes down to three things working together: your belly, your hands, and your feet.
So, how do we teach our body what to do? That’s where drills come in.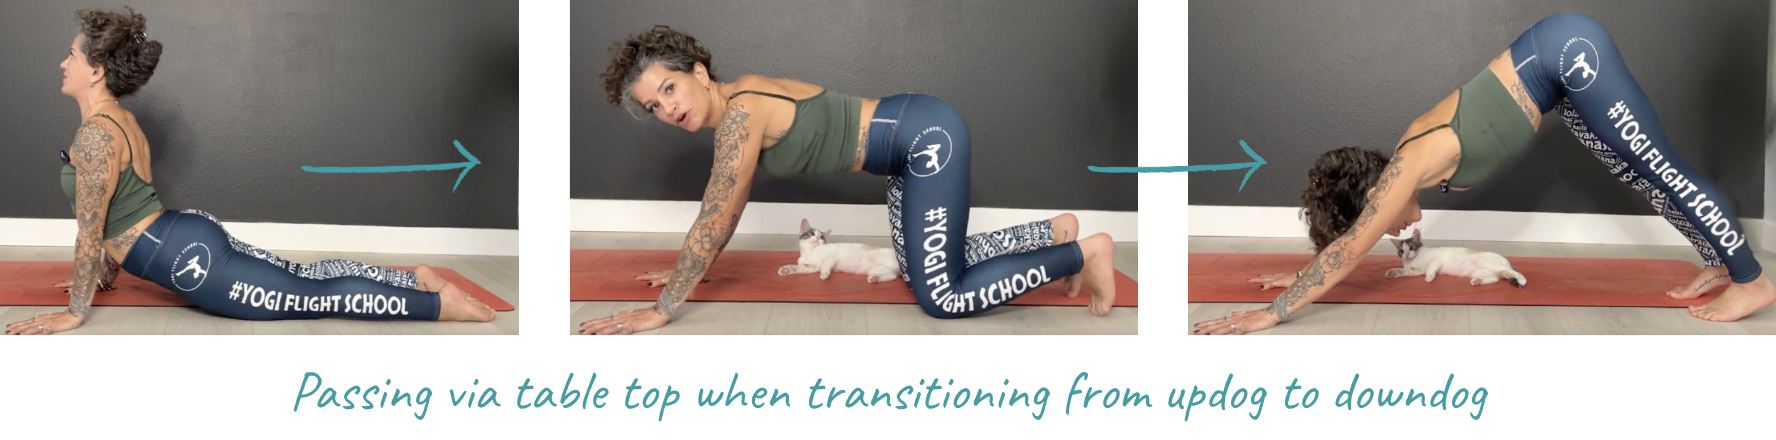
How to Fix Your Transition
Below are some drills that will help your body understand the mechanics of the transition, build strength where it’s needed, and train your timing so your vinyasa starts to feel seamless.
Before we dive in, it’s worth noting that this isn’t about brute strength or forcing your body into a pose! It’s about learning how to work with the muscles you already have, giving them the right signals, and letting your body discover the movement gradually.
Drill #1. Wake Up Your Core
Your core is the engine for this move. Practicing the lift on the floor first helps your body understand the motion before trying it in a full vinyasa.
- Lie on your belly.
- Pull your belly button gently toward your spine.
- Create just enough space under your belly for your hands to slide through.
- Lower back down and repeat a few times.
The lift doesn’t need to be big, just enough to feel your abs engage. This is the same engagement that will guide your hips as you move from Up Dog to Down Dog.

Drill #2. Activate Your Hands and Feet
Your hands and toes are your levers, which means they’re the points that transfer your energy into movement. Think of them as the push points that help your hips lift and move back. Without pressing into the floor, your hips stay stuck.
- From Up Dog, press firmly into your palms.
- Tuck your toes under slightly if it helps you feel the lift.
- Push through the tops of your feet (or toes, depending on your style) while keeping your belly engaged.
- See if you can use the push of the feet and hands to lift your hips up and back.
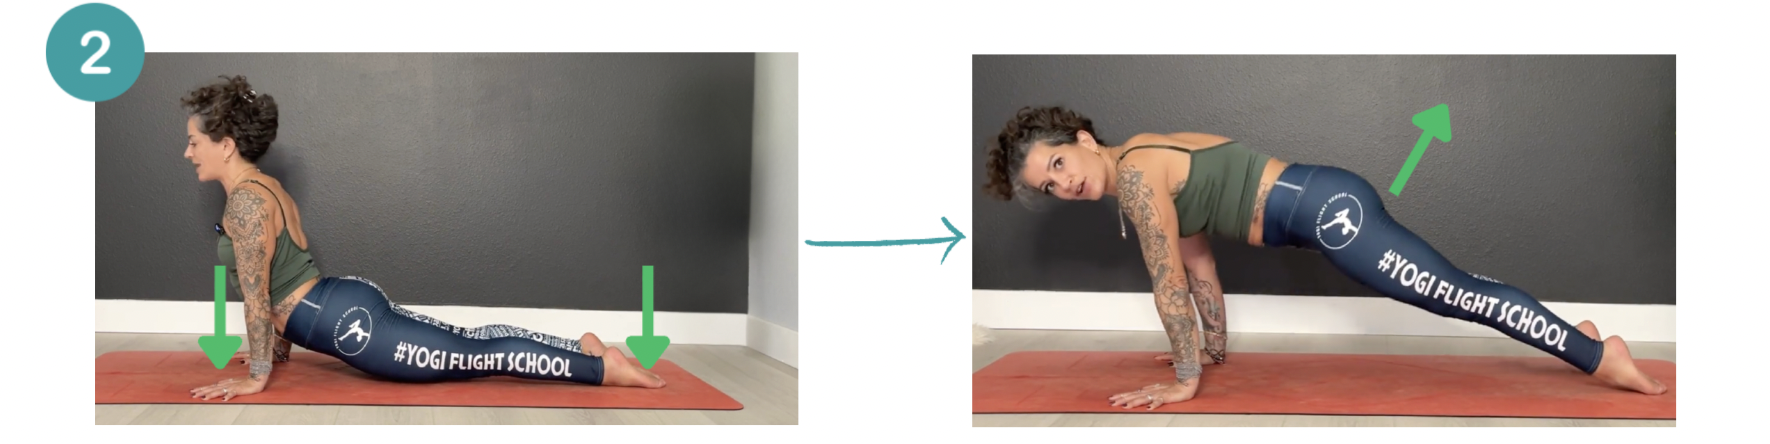
Putting It All Together
Once you’ve practiced the core lift and hand/foot engagement separately, it’s time to combine them in your vinyasa. Start in Up Dog. Engage your belly to lift the belly button away from the mat, press firmly through your hands and feet, and use this push to glide your hips back. No knees necessary. (ps., If you want some more tips for your down dog, check out this previous blog article!)
Practice slowly at first. If your timing is off or your body isn’t used to this coordination yet, it’s normal for things to feel clunky. Keep working the drills, and over time the transition will feel smoother, stronger, and more controlled. Your hips will go from “what the heck” to “ohhh, I get it” - Gorilla Glue not invited.
Want to see all of this in action?
Check out my YouTube video where I break all of this (and more) down!
And if you want even more guidance, my No Bullsh*t Yoga Pose Library has 90+ yoga poses fully broken down, with modifications, alignment tips, and confidence-building cues. No more guessing. Just clear, actionable instruction so that every pose works for your body.
