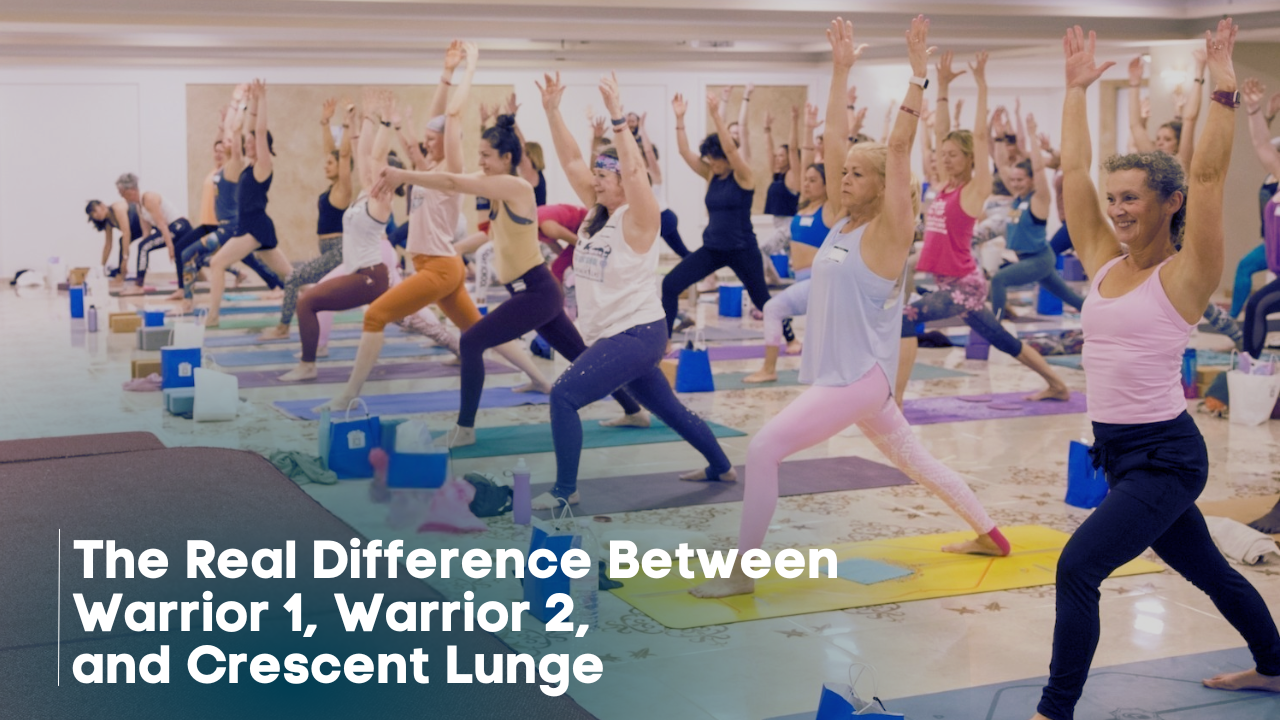
The Real Difference Between Warrior 1, Warrior 2 & Crescent Lunge
If you've ever been in class and your teacher cues you to move from Warrior 1, to Warrior 2, to Crescent Pose in three breaths flat, you’ve probably noticed something…
No one tells you what to do with your feet.
Teachers talk about “opening your hips” or “cartwheeling your arms,” but the foundation (the part that actually makes the pose stable) gets completely ignored. It’s as if your lower body is expected to magically know what it’s supposed to do.
Here’s what most students never get taught:
Warrior 1, Warrior 2, and Crescent Lunge each require a completely different foot position.
Not a tiny tweak. Not “same legs, different arms.”
Different stances. Different angles. Different biomechanics.
And when teachers don’t cue those differences, everything upstream gets thrown off: your hips end up facing the wrong way, your front knee starts doing weird things, your back leg does a great impression of the Hokey Pokey, and suddenly the whole thing feels more like fighting an actual warrior and less like practicing yoga.
In this week’s blog article, I’m breaking down exactly how your feet should be set up in each pose and why it matters. (ps., If your hamstrings grumble in any of these poses, check out this previous blog article!)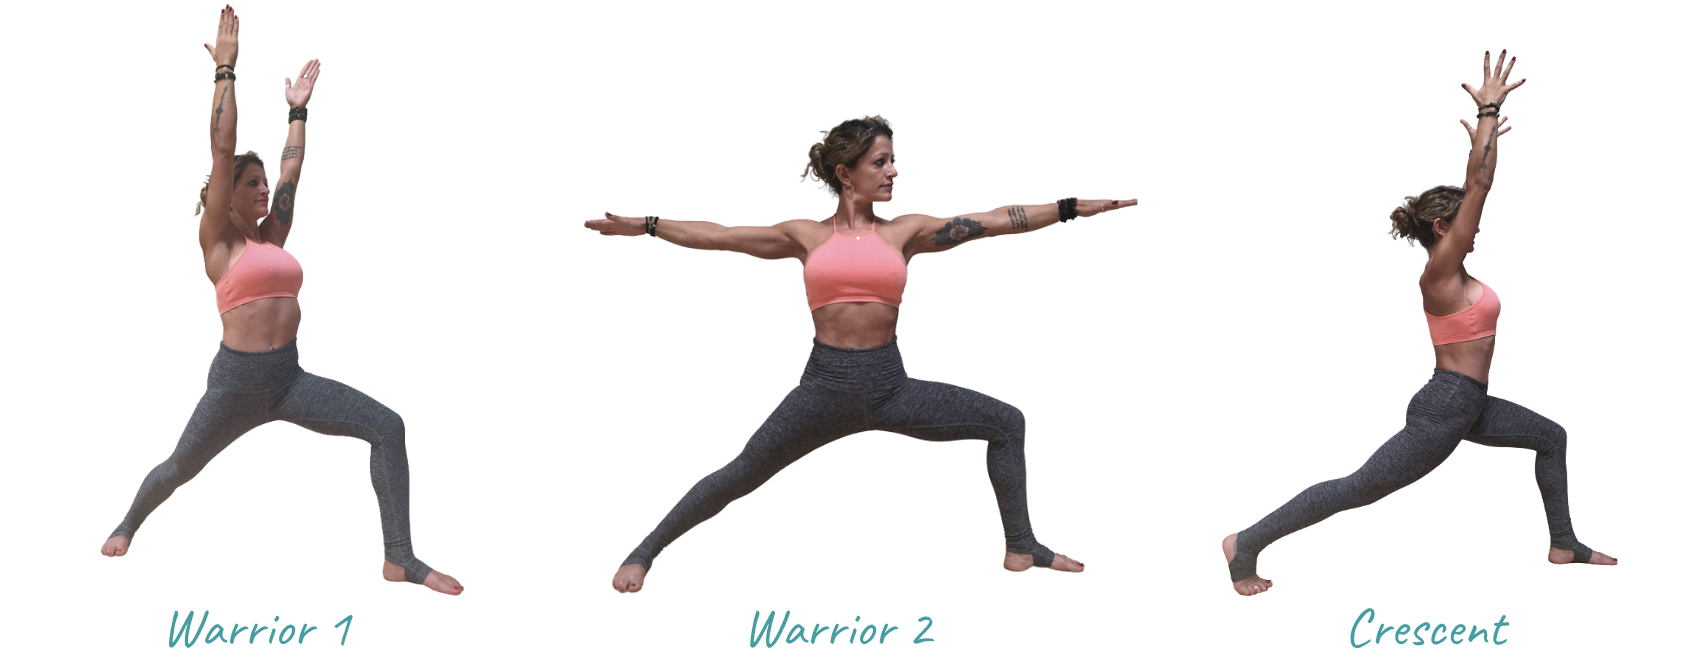
Why the Feet Get Ignored
Due to differences in yoga teacher trainings and just the way these poses get passed down, many yoga teachers don’t actually learn how to cue Warrior 1, Warrior 2, and Crescent correctly.
Some teachers are taught that the feet stay the same across all three poses. So that’s what they pass on to their students: move the arms, rotate the hips and the torso....but the feet stay put.
Other teachers assume students already know to adjust their feet. So they focus on the upper body, while the foundation quietly gets ignored and students are just expected to know what to do.
And sometimes, well… tradition. “This is just how we do it.” (If you heard a loud groan, it was probably me).
The Actual Differences
Although these poses might look like sisters from another mister, the feet tell a completely different story. Let’s break down where your feet should be in each pose:
Warrior 1:
Imagine train tracks running along your yoga mat (hopefully very clean train tracks because I'm not sure regular mat cleaner will get out train grease). The distance between the tracks should roughly match the width of your hips.
Place one foot on each track. Keep one foot pointing straight ahead. Turn the other foot out about 45 degrees and start sliding it back along the track. As you slide, bend the front knee. Stop when your front knee is bent and your back heel can still stay grounded.
Your pelvis is open on a slight diagonal to accommodate the back leg. Aim to square the torso toward the front of the mat.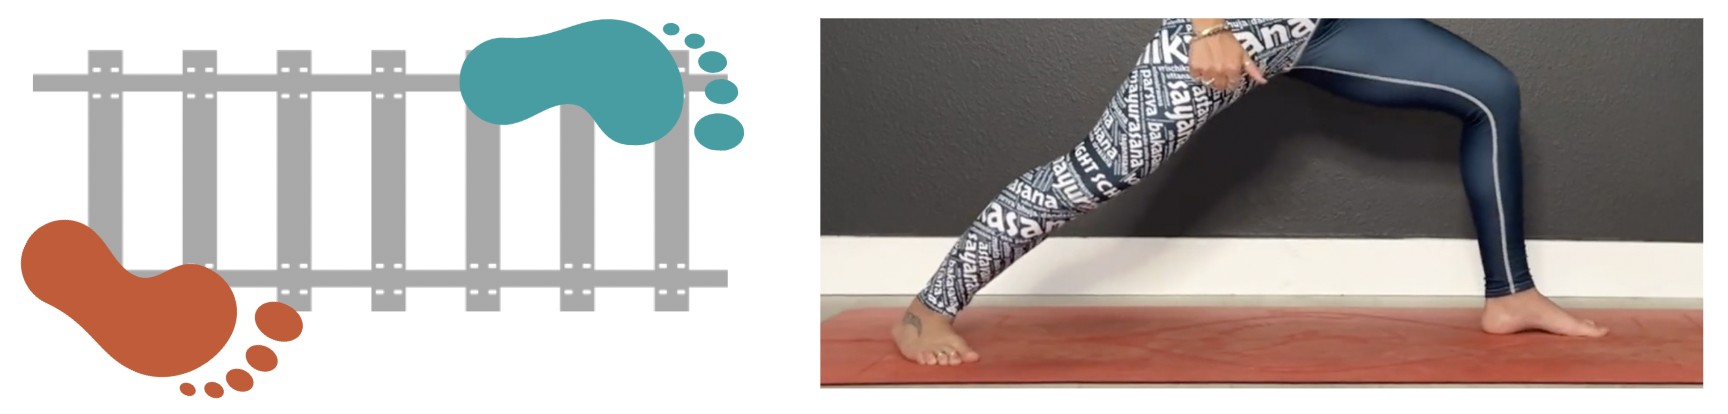
Warrior 2:
Now imagine your train driver decided to audition for Cirque du Soleil, hello, tightrope (whatever is happening in this studio today?!)! Step onto the tightrope with one foot directly behind the other.
Keep the front foot pointing forward (same as Warrior 1!), and turn the back foot out to about 90 degrees. Your front heel should roughly bisect the arch of your back foot.
As we did in Warrior 1, slide your back foot behind you as you bend the front knee. How far to slide? You want to stop when your ankles sit vertically beneath your wrists (when you take your arms in to their usual Warrior 2 position).
Here, the pelvis and torso open to the side of the mat. If you leave your feet in Warrior 1 alignment, your pelvis can’t rotate fully, the back leg twists awkwardly, and the pose feels unsteady.
* That being said, humans with challenged balance may benefit from taking their feet a little more towards train tracks than a tight rope, if this feels uber wobbly. 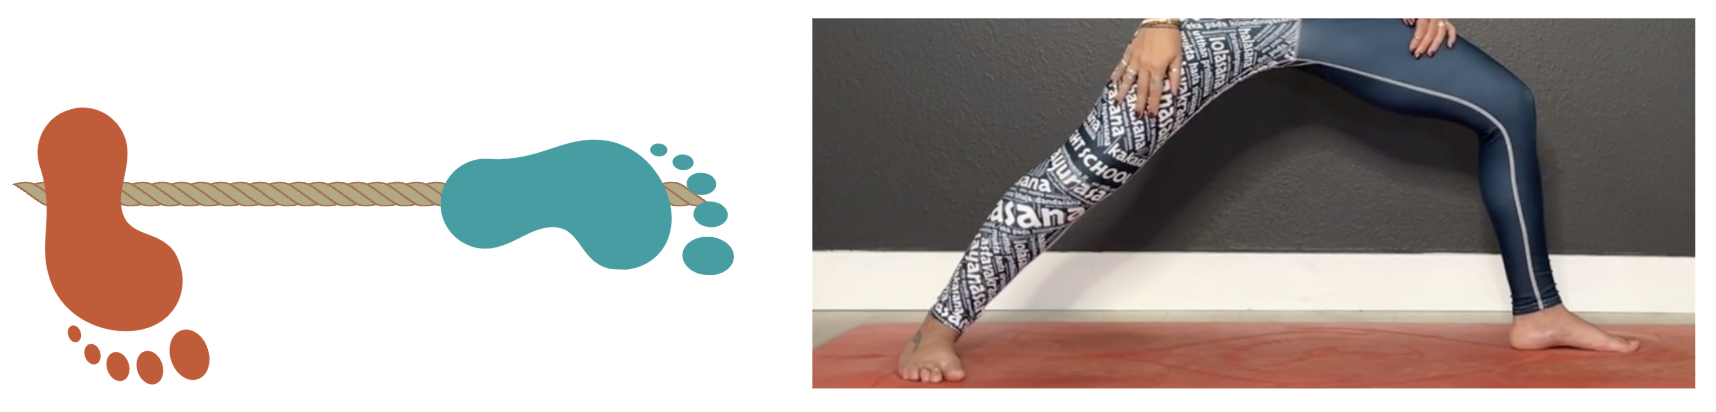
Crescent Lunge:
Our train driver is back on track (pun intended). Start in the same alignment as Warrior 1, but this time keep the back foot pointing forward, so both feet face the top of your mat. Lift the heel of the back foot so you’re balancing on the ball of that foot.
This stance lets your pelvis fully face forward.
The takeaway? Paying attention to your feet isn’t picky detail work. It’s the key to making these poses feel strong, stable, and actually enjoyable. Get the feet right, and the hips, knees, and torso fall into place more naturally. Ignore them, and you’re just flailing through a fancy choreography with your body wondering what the heck is happening.
So next time you flow from Warrior 1 to Warrior 2 to Crescent, give your foundation the attention it deserves. Your feet aren’t just passengers on the train, they’re the conductors!
Want to see all of this in action?
Check out my YouTube video where I break all of this (and more) down!
And if you want even more guidance, my No Bullsh*t Yoga Pose Library has 90+ yoga poses fully broken down, with modifications, alignment tips, and confidence-building cues. No more guessing. Just clear, actionable instruction so that every pose works for your body.
