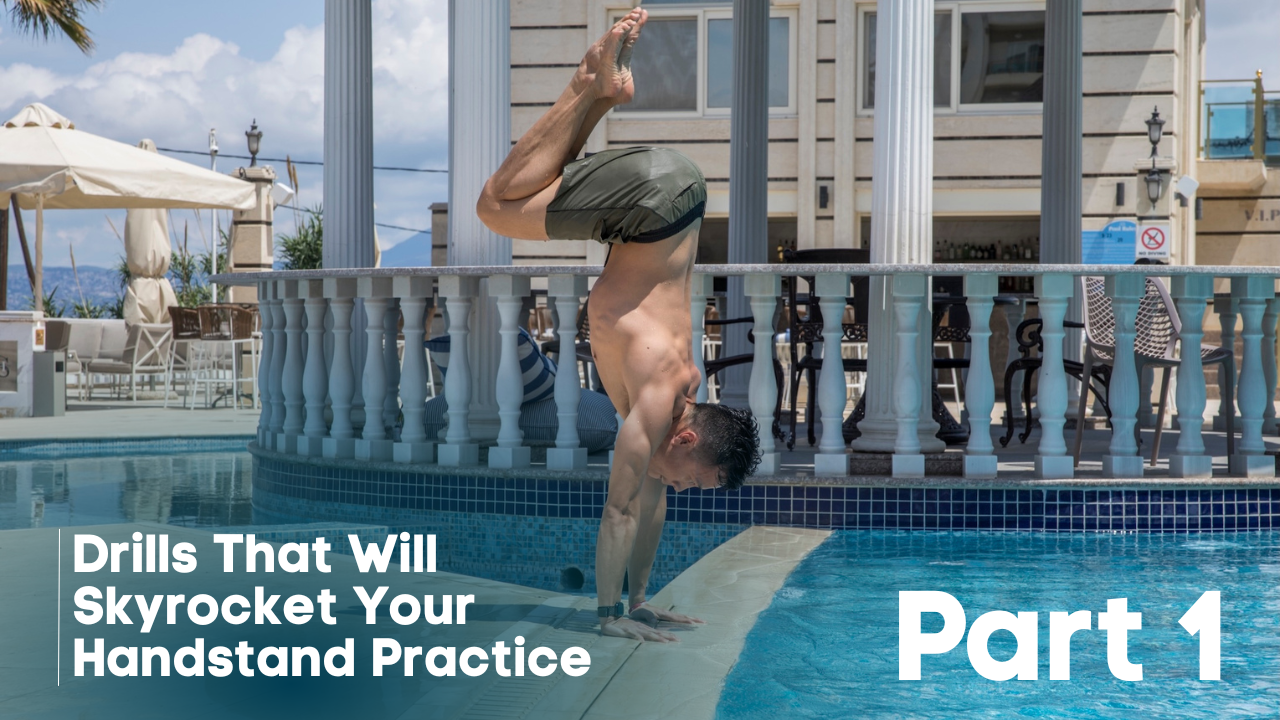
Drills That Will Skyrocket Your Handstand Practice: Part 1
If you've been kicking up to handstand over and over hoping that this time will be the time you finally stick it...I've got news for you.
You probably won't.
Why? Because you can't progress with just repetition alone. You need to prepare properly.
Handstand isn't just about being strong enough or brave enough to get upside down. It's about preparing your body systematically so that when you do kick up, your body actually knows what to do.
Most people skip the drills and go straight to the kick-up. Then they wonder why their wrists hurt, their shoulders collapse, or they bail out in a panic every single time.
The drills I'm sharing today will change that. They're the foundational exercises that prime your body for a stable, controlled, confident handstand. And the best part? You'll feel the difference quickly.
Let's break down five essential drills that will actually move the needle on your handstand practice.
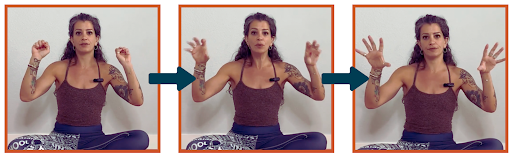
Wrist Drill #1: Flicky Flicky
When you're standing on your hands, your wrists act as your ankles! If your wrists aren't warmed up and ready to bear weight, you're setting yourself up for discomfort (or worse, injury). Warming up the wrists with movements that flex, extend, and circle them, plus actions that wake up your foerarm muscles and palms, is essential. Secretly, the strength of your wrists comes from your forearms and hands (not your actual wrists!)
How to do Flicky Flicky:
Pretend you've just washed your hands and there's no towel to dry them on. Flick your fingers vigorously (not your wrists!) and imagine you were flicking the water off your wet hands. This heats up your finger extensor muscles and your finger flexor muscles, prepping them to grip and stabilize when you're upside down.
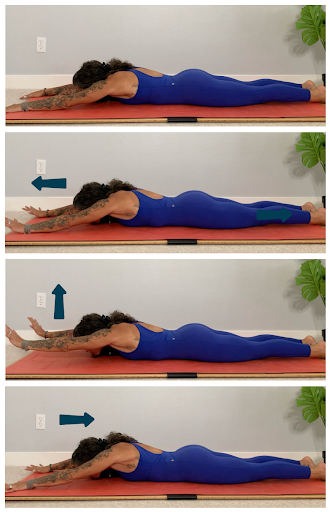
Shoulder Drill #1: Prone Shoulder Shrugs
This movement helps build strength in the upper trapezius and scapular stabilizer muscles, which are essential for holding a steady, aligned handstand. Shoulder shrugs teach you how to elevate your shoulderblades and create a solid base to support your body weight in a handstand, enhancing overall stability.
How to do Prone Shoulder Shrugs:
Lie face down on your mat and stretch your arms overhead on the floor, biceps alongside your ears.
- Gaze toward your fingertips, keeping your chin close to the floor.
- Slide your hands along the floor as far in front of you as possible, reaching away from your body.
- Maintaining the reach with the hands, lift your arms as far off the floor as possible without lifting your head or shoulders.
- Lower the arms back to the floor, and then pull the shoulder blades down your back to bring the hands closer to the face. Arms should stay straight.
Return to the starting position and repeat 8-10 times. If this seems impossible, you can try the exact same drill standing at the wall with your toes, hips, chest, and chin on the wall!
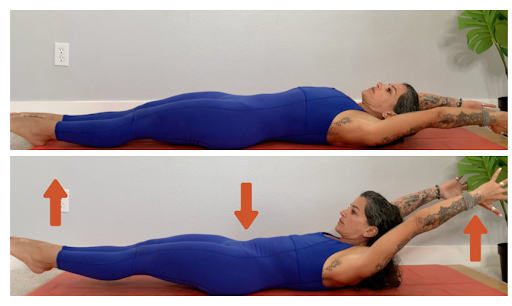
Core Drill #1: Hollow Body Holds
This drill engages the core and teaches you how to maintain a tight, stable torso, which is crucial for keeping a straight body line in a handstand. Mastering this position on the ground builds awareness to carry over to your handstand practice, helping you maintain alignment, control, and balance while inverted.
How to do Hollow Body Holds:
Lie on your back with your arms extended overhead and legs straight.
- Press your lower back firmly into the floor, then lift your shoulders, arms, and legs just a few inches off the ground, creating a "hollow" shape with your body.
- Engage your frontal core throughout, and aim to keep a smooth, curved line from fingers to toes, holding the position without arching your back or lifting your hips. Your lower back should stay on the floor.
Hold for as long as you can with good form, working up to 20-30 seconds.
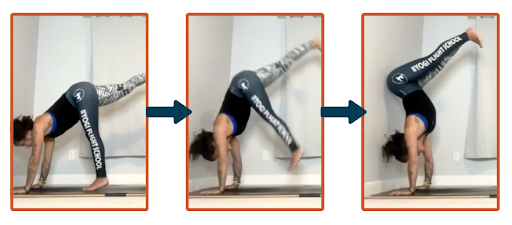
Pelvis Drill #1: Butt to Wall
This drill is essential for handstand practice because it trains you to achieve alignment by stacking your hips over your shoulders, giving you the ability to get up without banana back, or slamming your feet into the wall. It also helps you refine body awareness and teaches you to manage the momentum in your kick-up, both of which are critical for developing a freestanding handstand.
How to do Butt to Wall:
Start in your kick-up position and place your hands shoulder-width apart a few inches from the wall. As you kick up, focus on using just enough force to bring your hips up and toward the wall, aiming to make contact with the wall with your butt first. Avoid letting your feet or legs smack the wall. This requires controlling the kick's height and power!
Practice several times until you can reliably reach the wall, butt first!
Exit Drill #1: Wall Bails
This drill is valuable because it helps you get rid of the fear of free-standing balance. What stops MOST people from balancing in the middle of the room is not really technique, but fear of falling. This drill helps you gain control over your exit strategy, and builds your confidence quickly. When you know you can exit your handstand anytime you want without hurting yourself, you become a lot willing to go for it. By learning to bail out of a handstand safely and intentionally, you build both the body awareness and the confidence needed to practice freestanding handstands with less fear of falling, getting you to your goals way faster. Don't avoid learning how to fall!!
How to do Wall Bails:
To start, enter into a handstand shape with your chest facing the wall, placing your hands shoulder-width apart a few inches from the wall. Practice bailing by first stepping one hand slightly forward (away from the wall), followed by removing the same side leg from the wall, and then slowly allowing the second leg to come down, stepping out of the handstand.
Repeat both sides and see if you have a preferred side that feels more comfortable to exit on.

Putting It All Together
These five drills aren't random exercises. They're the building blocks of a solid, sustainable handstand practice.
When you warm up your wrists, activate your shoulders, engage your core, align your pelvis, and practice your exit strategy, you're not just "trying" handstand anymore. You're training it with intention and intelligence.
Start incorporating these drills into your practice 2-3 times per week, and watch how quickly your handstand transforms. You'll feel more stable, more controlled, and way more confident.
Want to go through some of these drills together in a follow-along format?
Click here for my free handstand class. It will be a short webinar that explains the Yogi Flight Method approach to arm balances and inversions, and then a full handstand practice incorporating many of these drills.
