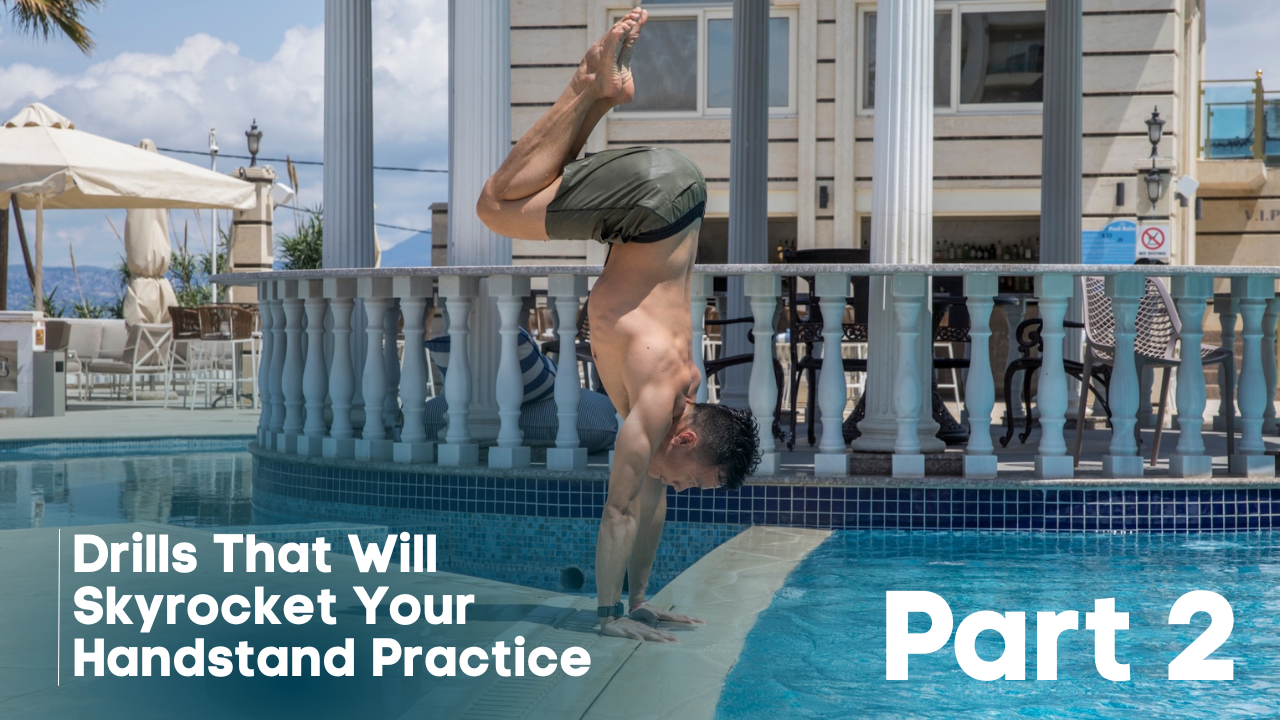
Drills That Will Skyrocket Your Handstand Practice: Part 2
Welcome back!
If you've been working through the drills from Part 1, you've already started building the foundation your handstand needs (prepped wrists, stable shoulders, engaged core, aligned pelvis, and a solid exit strategy).
But this is important: handstand isn't a one-and-done kind of deal. It's a practice that requires layering skills, refining control, and progressively challenging your body in new ways.
That's exactly what Part 2 is all about.
These next five drills take everything you learned in Part 1 and level it up.
We're going deeper into wrist strength, shoulder stability, core compression, pelvic control, and (most importantly) building the confidence to practice handstands away from the wall.
Let's dive in.
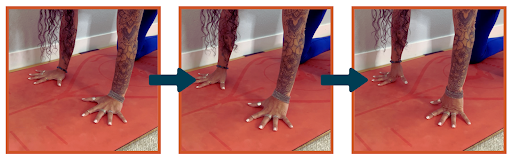
Wrist Drill #2: Wrist Pushups
Wrist pushups strengthen and warm up the wrist joints, preparing them for weight-bearing activities like handstands. Proper wrist preparation helps you avoid wrist pain and makes your practice feel strong and stable.
Unlike the "flicky flicky" drill that warms up the fingers and forearms from part 1, this one works on the muscles of your palms that are essential in gripping the floor too apply your handstand's "braking system."
How to do Wrist Pushups:
Start on all fours (hands and knees) with your hands placed under your shoulders, index fingers pointing forward.
- Gently shift your weight forward onto your hands.
- Slowly lift your palms off the ground so that only your fingers are in contact, from the middle knuckle down, and then lower the palms back down to the mat.
- If you feel like you cannot lift the palms, move the knees closer to the hands. Want more of a challenge? Move the knees further back!
Repeat for several reps, keeping the motion slow and controlled.
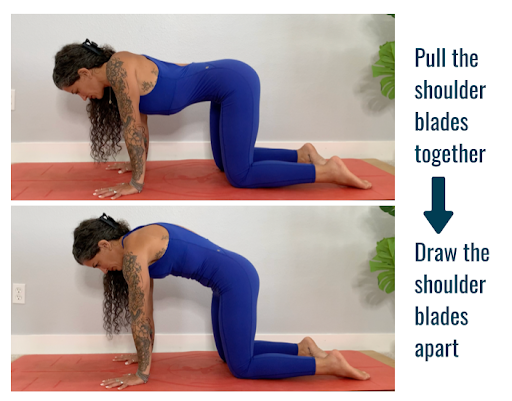
Shoulder Drill #2: Scapular Pushups
This exercise targets the serratus anterior and other stabilizing muscles around the scapulae, which are essential for shoulder stability. Building scapular control and strength with scapular push-ups helps you maintain shoulder alignment which is a HUGE key to handstand!
How to do Scapular Pushups:
Start on all fours with hands under shoulders and knees under hips. Without bending your elbows, squeeze your shoulder blades together on your back body (scapular retraction), then move the scapulae apart (scapular protraction) so that they wrap around the sides of the body.
Repeat 8-10 times slowly and with control.
Core Drill #2: Block Holds
Practicing this drill improves your ability to keep your center of gravity tight and close to your body, making it easier to balance and hold your handstand with stability and control. This drill helps train compression strength by forcing you to actively bring your thigh and torso together, which is essential for a controlled entry into handstand and working towards that "straight line" everyone wants.
How to do Block Holds:
Place a (ideally foam!) yoga block between the top of one thigh and the front of your torso, close to your lower abdomen.
Squeeze the block tightly into your torso with your thigh as you kick into a charger-shape handstand (one knee towards your chest, other leg straight up).
Make sure both legs and feet are super active and engaged. It doesn't matter if you balance the handstand. The aim is to NOT drop the block!
You can also do this drill at the wall!
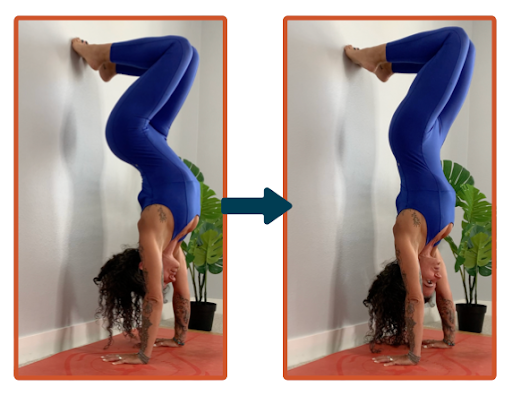
Pelvis Drill #2: Tuck That Butt
This exercise is crucial for handstand training because it teaches the foundational skill of finding a "stacked" position, where your hips, shoulders and wrists are stacked on top of each other.
By practicing this control over pelvic position, you train core engagement and develop the body awareness needed to maintain balance in a free-standing handstand without an exaggerated arch in the lower back.
How to Tuck That Butt:
Start by kicking up into a handstand at the wall.
- Place both feet on the wall and bend your knees to roughly 90 degrees.
- Press both feet into the wall and slowly move to an anterior pelvic tilt (arching your lower back and sticking your butt out). Notice how that feels.
- Then slowly move to a posterior pelvic tilt (tucking the pelvis under, flattening the lower back).
Repeat this tilting motion slowly, focusing on maintaining shoulder stability and feeling how each tilt affects your alignment. We want to aim for a degree of posterior pelvic tilt in our straight line handstands.
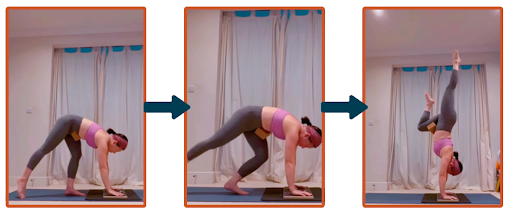
Exit Drill #2: Free-Standing Bails
Kicking up to progressively higher handstands (10%, 20%, 50%, 100%) in the middle of the room and practicing bailing each time is an effective drill for developing control, balance, and confidence in free-standing handstands.
This drill is crucial because it teaches you to modulate the power of your kicks and gain comfort with controlled exits, which are key skills for practicing handstands without a wall.
How to do Free-Standing Bails:
Start by standing in a lunge position with your hands shoulder width apart on the ground.
- Kick-up with just enough power to lift your legs slightly off the ground.
- Immediately move one hand slightly outward to the side and let the legs follow in the same direction, so you end up in a crouch position on one side of your mat.
The sideways action shifts your weight, allowing your legs to come down to the floor in a controlled cartwheel-like motion. - Gradually increase the power to 20% and then 50% of your maximum kick height, each time focusing on maintaining control and executing a clean bail.
- When you feel ready, go for 100% power in your kick ups!
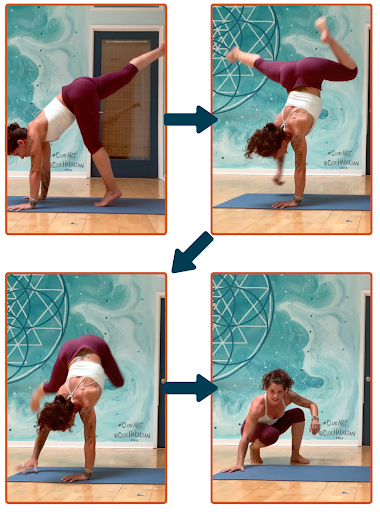
By progressively increasing the kick height and mastering the bail, you build body awareness, core engagement, and the confidence needed to reach a full handstand safely, without over-kicking.
Bringing It All Together
You've now got ten drills (five from Part 1 and five from here in Part 2) that systematically prepare your body for handstand from every angle.
These aren't just random exercises. They're strategy.
Handstand doesn't just magically occur. You have to train each piece, without giving up on yourself or on it. It's a journey, and drills are what makes it come together. Not just randomly kicking up twice a week.
Start incorporating these drills into your practice 2-3 times per week alongside the drills from Part 1. Mix and match based on what your body needs that day.
Some days you'll focus on wrists and shoulders. Other days, core and pelvis. The key is consistency and intention.
Want to go through some of these drills together in a follow-along format?
Click here for my free handstand class. It will be a short webinar that explains the Yogi Flight Method approach to arm balances and inversions, and then a full handstand practice incorporating many of these drills.
Click here to get your handstand on!
